Getting a new set of acrylic nails will last for more than 2-3 weeks, depending on various factors. But after a limited time, the nails start going bad. In other words, they crack or lift, which requires a refill. But how much does acrylic nail fill cost?
Well, the average price for acrylic nails fill-in is between 25$ and 30$. However, the cost may vary depending on several factors, like your region, the quality of work done, and your nail condition and requirements.
Here in my city, California, ibeauty Nails and SPA (a famous salon) costs me 40$ for a normal refill. But sometimes, I add designs that cost me around 45$. It’s still affordable if you compare it to the Bamboo SPA, which costs you 60$ for a fill-in with custom designs.
So the price is not specific and varies from salon to salon and from location to location. But what matters is you get the nails done with satisfactory results.
Here in the article, we will go deep into the factors that decide the total cost of acrylic nail fill. Moreover, we’ll see how to cut down the cost.
Best Way To Find Acrylic Nail Fill Cost
As the price varies, the best way to find acrylic nail refill costs near you is Google Maps if you’re searching for a salon. It’s pretty simple, and you may know it already.
Just open Google and search “acrylic nail fill near me,” and the browser will redirect you to the page of salons near you. Click anyone and contact them if they have given their phone number.
However, most of the well-reputed salons mention their acrylic nail prices online, making it easy for customers to find their services and rates.
4 Factors That Affect Acrylic Nail Fill Price
As I told you earlier, a few factors that decide the fill cost need to be considered. So let’s see how these factors play their role and how much for a nail fill.

- Your Location
The very first thing is your residence. You’ll notice a clear difference between the costs of nail fill. Salons in different countries may charge you in their own way. All these charges greatly depend on the labor cost.
But how much is a fill for acrylic nails in an average salon? As I mentioned earlier, in California, you have to pay between 30-50$, while in Los Angeles, the average acrylic fill price drops to 30$.
- Quality of Work And Salon
Another crucial factor is the quality of work done. Every woman wants quality, and they know it can put stress on their pockets, and they have to spend to get what they want. The salon environment and the expertise of the nail technicians decide the quality of work.
So how much does a refill on nails cost by a quality salon? Well, if you’re going to a well-reputed salon that has good machinery, safety measures, professional workers, and good customer service, you can’t expect them to cost you in an affordable range. They’ll definitely charge you more.
On the other hand, if you’re visiting a local salon that lacks the facilities and professionals, you’ll have your nail fill done for a few dollars.
Whenever I’m in a hurry, I visit the nearest local salons, and believe me, I’ve done my nail fill for 15$ many times. But yes, it’s just a temporary alternative; these local salons don’t work deeply to remove the cracks or drill the nails into the proper shape.
- Condition of Your Acrylic Nails
The condition of your nails is one of the main factors that will add more cost to your nail refill. For example, if your nails are lifted or they are cracked, there will be needed more work on them.
Cracked or damaged parts are first removed using a coarse and fine grit drill machine, which needs more concentration and expertise. The lifted nails are also corrected using nail products.
So there’s a need for a lot of hard work and attention, and I don’t think any salon will offer you a low cost on these repairs. And I don’t think you want to get your lousy nail condition corrected at a local salon as there is no safety, and your natural nails, including the skin beneath, could be damaged.
Moreover, the length of your acrylic nails is also a factor to be charged more by a salon. The longer the nails, the higher the cost. So how much is a nail fill including all these nail conditions? Well, considering all these repairs and refills, the overall cost may go up to 40-50$.
- Custom Nail Art And Your Requirements
How much does a nail fill cost you with custom designs? As I mentioned earlier, the basic acrylic nail fill-in cost varies, but demanding custom designs will add an additional 5-10$ to the total cost.
Different nail shape designs may have different expenses due to the labor required to do them. For example, the cost of coffin nails is different from the cost of French style and others.
Most of the salons don’t charge for basic nail polish. However, if you want the nail polish of your choice, you’ll be charged around 2-3$ for that. I usually prefer gel polish over my acrylic nails as it is long-lasting and has an intense color. Even I have used acrylic paint as nail polish many times.
Any additional requirements to decorate your nails will definitely increase the total cost. Many salons offer a complete package that includes many services.
So you better search “acrylic nail fill near me” on Google Maps, and you’ll find the salons and their official sites, where you can find their services, packages, coupons, and discounts.
How To Reduce Acrylic Nail Fill Cost?
There are many ways you can reduce the total cost of nail refilling. You can choose a budget-friendly salon or bring your nail polish with you whenever you visit the salon. Moreover, you can opt for less costly products and skip extra decorations and designs on nails.
But the best way to cut down on nail fill-in price is to do it at home. It’s not that complicated. You may save up to 700$ or more annually with just a few necessary products and tools.

So how to do acrylic nail fill at home? I’ve explained the procedure briefly. I hope it will help you.
Materials Needed:
- Acrylic nail powder
- Acrylic nail liquid
- Nail clipper
- E-file
- Hand-file
- Acrylic nail brushes
- Nail polish
- Nail primer
- Tissue
You can simply order an acrylic nail set from Amazon. The set contains all the necessary products and tools to do DIY acrylic nail fill at home. But how much does a full set of nails cost? The complete set will cost you something between 30-50$.
Step 1: Remove The Nail Polish
Go in with an extra coarse drill bit and remove the gel Polish and gel top coat. You need to file all of the nails going around the cuticle area and then the sides as well. This is just to get rid of the Gel Polish.
I want to mention that whenever you are doing this, you need to make sure that you keep your bit moving at all times. You don’t wanna leave it in one spot for too long because it’s gonna produce friction and cause your nails to burn. I usually use the E-file at 10,000 rpm whenever I’m doing this.
Step 2: Push Cuticles And Clean Nails
After removing the polish, take the cuticle pusher and push the cuticles. This is going to expose the new growth in the hope of reducing lifting. So make sure that you push those cuticles back.
You can use any type of cuticle pusher as long as it can be disinfected. Next, go in with a 180 sanding band and use the E-file at 5000 rpms during this step to file the nails to get rid of any of the shine that is on there.
You know that our body produces a lot of oils. Those oils happen to be on our new beds, which is why they are shiny. So we just have to go in and gently follow the way that shines and remove it, making sure that we get as close as we can to the cuticle area because that’s where nail lifting will come from. Clean the nails with a brush to remove the dust.
Step 3: Apply Nail Primer
The next step is applying the nail primer. This is going to help the acrylic adhere better to the natural nail, so you won’t get any lifting. Try to apply a single coat of primer, especially near the cuticle portion and nail bed.
Step 4: Apply the Acrylic Mixture
Now go for applying the acrylic nail mixture. You know the basics, like mixing acrylic liquid with powder. Dip the tip of the brush in the liquid first and then in the powder. In other words, you’ll need to directly mix the liquid and powder on the tip of the brush and apply them immediately to the nails.
Place the first bead closer to the cuticle area. You need to place it down, pat it down, and very gently brush it down toward the tip.
Go in and clean around the cuticle area, but make sure that whenever you are brushing the acrylic down that, you are super gentle. If you brush too hard, you’re gonna be brushing that product off the nail.
Place another bead right in the middle, and remember that when you are applying acrylic, you wanna make sure that you are constantly looking at the nail from different angles. That way, you know exactly where to add products. Because the most important thing is making sure that you have a good apex.
It is the back of the nail that is going to make sure that you have strong nails. So that way, if you were to hit your nail on something, your nail wouldn’t break.
Step 5: Shape Your Nails
The next step is shaping your nails with a nail shaper. Go around the sides gently and then redefine the tip of the nails, putting the shaper at 90 degrees. Make sure you watch your angle, as it can spoil the shape if you tilt the shaper the wrong way.
Step 6: File Your Nails
Now go in with the fine ceramic bit to file all of the nails, starting around the cuticle area, going from the right side all the way over to the left side, and going back and forth until you are able to see where the cuticle is, where the natural nail is, and where the acrylic is.
That way, you know that the acrylic is not on the skin. I usually do this at 10000 Rpms. But whatever speed you feel comfortable with is good for you.
Do the same thing on all of the nails, and make sure that whenever you are doing this, you get as close as possible to the cuticle area because that is where your lifting will come from.
You don’t wanna leave any gaps between the natural and the acrylic nails because any moisture that gets trapped underneath is going to cause the nail to lift, and that is where about 80% of your nail lifting comes from.
Step 7: Buff Your Nails
Now Go in with the buffer, and this is gonna get rid of any of the scratches left on the nails from the hand file or the E-file. It makes sure that your nails look really good, smoother, and natural.
Wipe the nails with alcohol wipes to get any of the dust off the nails.
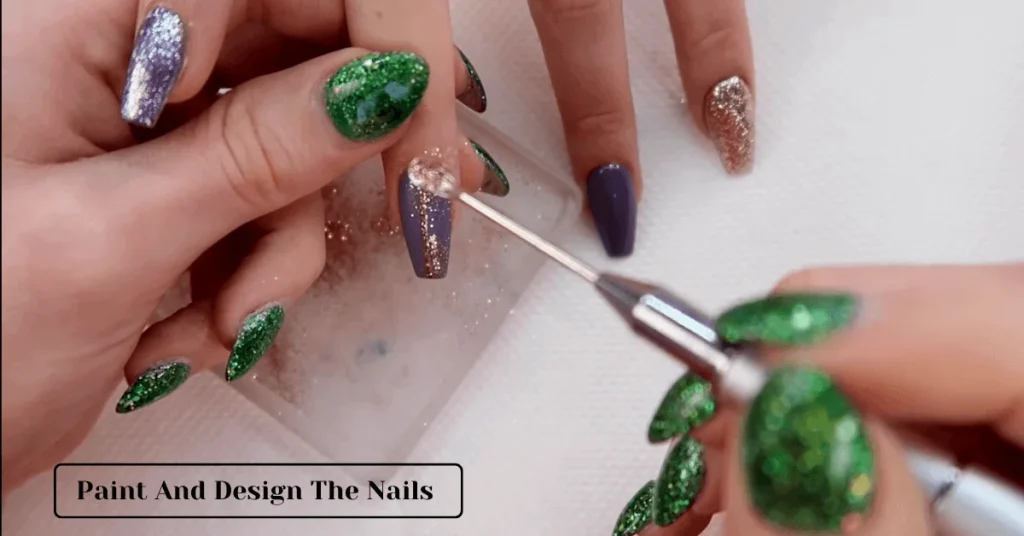
Step 8: Paint And Design The Nails
The next step is applying the nail paint. You can cover the whole nail with a single color or choose to paint the corners only. It depends on your requirements and style.
To decorate your nails, you can add bling or create any art. But make sure you know what size brush is best for acrylic nails for this purpose.
For sharp painting and designs, you’ll need a thin-haired brush, while for painting the nails, a thick-haired brush is perfect. Some people even use paintbrushes for acrylic nails.

FAQs
How much do acrylic nails cost?
Generally, a complete set of acrylic nails will cost you 30-50$, which includes nail products and tools.
How often do you need to get acrylic nails filled?
Newly applied acrylic nails may last for more than two months, depending on your care. But they need to be maintained and filled after every two weeks.
How long does acrylic nail fill last?
Acrylic nail fill will last for more than two months if you take proper care of them and refill them from time to time.
How much is a fill in for nails?
Salons will charge you 30-50$ for a basic acrylic nail manicure. But if you want some designs or custom art on your nails, 5-8$ may add up to the total cost.
How much is a nail refill with gel polish?
Gel polish is more costly than regular nail polish. Gel polish will cost you an additional 5-10$ besides the refilling cost, which is, on average, 25-30$.
Final Words
Prices are not the same, and they keep on changing, but the main thing is getting quality work at a low price. Finding a salon where you get satisfactory results in a low range requires a struggle.
Acrylic nail fill costs get high with time, so I recommend you learn to do it at home to save you some bucks. I hope this post helps you find the best price for your nails. Please comment below for queries and suggestions.
Thank you!

